Experiment

SEED Science Laboratory Activity Water Quality and Water Treatment

PrintPrint

Have you ever thought about where your water comes from? For most people, this water originates from one of the following sources: rivers, lakes, reservoirs, or wells drilled into aquifers—water stored underground in rock layers. But is that water clean enough to drink?

For most of us, the water we use at home or in school is clear, is colorless, and has no odor. But often, the water does not start that way. Surface water—rivers and lakes, for example—and groundwater are sometimes polluted by waste from cities, factories, and farms. And minerals in the rocks can affect the quality of groundwater.


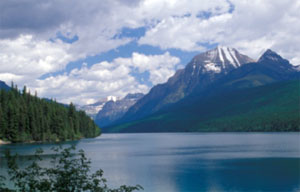
Scenic glacier
Image courtesy of National Park Service.

So, who makes sure that water is appealing to drink and safe to use before it reaches us? Large communities usually maintain public water supplies. Water is collected, treated, and distributed to residents. In smaller communities and rural areas, people rely on private wells for their water supply. Water from both public and private suppliers often needs some treatment to ensure that it is safe to drink.   

The Activity

Water quality is a measurement of the impurities in water besides water molecules, substances including dissolved salts, dissolved gases, and sediment. Clean, high-quality water contains few of these substances. In this activity, you will make a model to demonstrate some of the general processes that water treatment plants might use to remove unwanted substances from water. Although the processes in this activity are different from those actually used in water treatment plants, the activity gives you an idea of some of the methods used for water purification.   


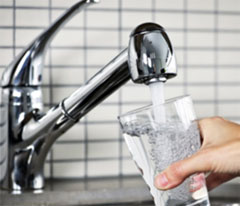
Water from tap
Image courtesy of Environmental Protection Agency.

Tools and materials

  • Six 2-L transparent plastic bottles
  • Clear packing tape
  • Scissors or other cutting tool
  • Water
  • Vanilla flavoring
  • Two “pinches” of soil
  • Cooking oil
  • Food coloring
  • Two small sticks for stirring
  • Silt, clay, or very fine sand
  • Masking tape
  • Permanent marker
  • Two coffee filters
  • Two rubber bands
  • Clean sand
  • Clean small gravel
  • Alum (potassium aluminum sulfate)—available as a cooking spice
  • Notebook
  • Hydrogen peroxide (optional)

Note: You may want to wear safety goggles when handling the liquids for this activity.

What to do

  1. Step 1

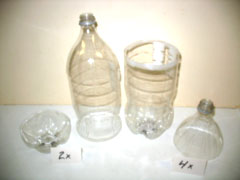
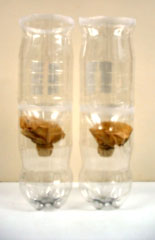
    Rinse out the six 2-L bottles and remove the labels by peeling or scrubbing. Cut off the bottom 5 cm (2 in) from two of the 2-L bottles. Cut off the tops from the other four 2-L bottles to make four open cylindrical containers each approximately 20 cm (8 in) tall. Smooth all cut edges by covering them with clear packing tape.

    Caution: Use scissors or other cutting instruments carefully.

  1. Label two of the open cylinders 1 and 2, using masking tape and a marker.
     
  2. Step 3

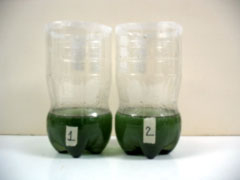
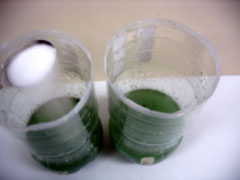
    Prepare the “contaminated” water for the activity by adding the following to each of your two water sample containers:

    • About 7.5 cm (3 in) of water
    • One spoonful of vanilla flavoring
    • One pinch of soil
    • One spoonful of cooking oil
    • Two drops of food coloring (we used green)
    • One spoonful of silt, clay, or very fine sand

     
    Thoroughly stir the mixtures.

  1. Observe the water samples closely. Smell the water as you pour a little from one container to the other and then back. Describe the samples in your notebook. Set the two water samples aside.
     
     
    Step 5
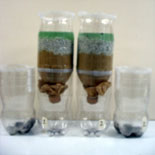
  2. Use the remaining two open cylinders and the two bottomless bottles to make filtering systems. Start by placing a coffee filter over the mouth of each bottomless bottle and fasten snugly with a rubber band.
    Step 6
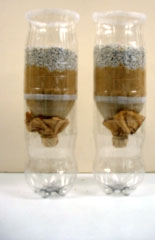
    1. Turn the bottomless bottles upside down and set each of them inside one of the open cylinders.
    Step 7
    1. Carefully pour a 15-cm (6-in) layer of clean sand into each upside-down bottle and tamp down gently. Then place a 5-cm (2-in) layer of clean small gravel on top of the sand.
       

      Note: Make sure the sand or gravel is clean by pouring a layer of water about 5 cm (2 in) deep onto the gravel layer of each filter. Watch the water as it comes out through the coffee filter. If the water is clear, discard that water and move on to step 8. If the water is not clear, repeat this process until the water coming out of the filter is clear.

    Step 8


    1. Add a large spoonful of alum to the water in container 1. Stir the water thoroughly. Observe the water every five minutes for 15 minutes and record any changes in your notebook.
    Step 9
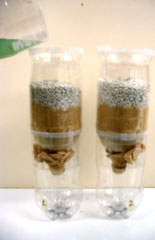
    1. Pour the contents of container 1 into one of the filters; pour the contents of container 2 into the other filter. Be sure to pour only the liquid into the filters, not the sediments in the bottom of the containers.
    Step 10
    1. Record the start time in your notebook. Observe the flow rate as the two water samples move through the filter and collect in the bottom.
    1. After the two water samples have gone through the filter, observe them closely and describe them in your notebook. Smell them but do not taste or drink them. Do they look the same, or are they different? If they are different, what do you think is the reason?
        Optional: Stir in a drop or two of hydrogen peroxide to water sample 1. What effect, if any, did this have on the sample?


    2. Dispose of all liquids by rinsing them down the drain.

    How are the two filtered samples alike? How are they different? Why do you think they are different?

    Related Article


    Digging Deeper

    Digging Deeper

    Find out more about
    water treatment and filtration.


    This content has been re-published with permission from SEED. Copyright © 2024 Schlumberger Excellence in Education Development (SEED), Inc.

    Course: 

    113463