Fruit Power
Did you know that some of the fruits and vegetables you eat can also help you make electricity? Try this and see!
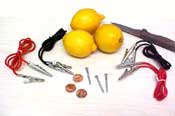
Tools and Materials
- Three lemons (limes will do)
- Three shiny pieces of copper such as coins or nails
- Three zinc-plated screws
- Four wires, preferably with alligator clips on the ends
- Small knife
- Small paper sticky labels
- Red light-emitting diode (LED) with a low voltage rating (available from www.radioshack.com)
- Small plastic container, opaque and preferably black (not clear plastic)
- Nail or small awl
|
WATCH VIDEO TO SEE HOW TO CONNECT FRUIT BATTERIES IN SERIES |
|
WATCH VIDEO TO SEE HOW TO MAKE A FRUIT BATTERY |
The zinc-plated screws can be found at most hardware stores. They are also called "galvanized" screws. The zinc plating, which is there to prevent rusting of the steel screw, gives them a shiny look. The wires with clips can be found at hardware stores or at electronics suppliers.
What to Do
1. The juice inside each lemon needs to be released. You can dothis by rolling each lemon along the table top. Press down with your hand and roll until you feel the lemon become sort of "squishy." The purpose of this is to release the juice inside the lemon. This step is very important; it helps you to get the maximum response from your lemons.
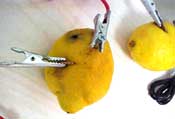
2. Push and then twist a zinc-plated screw into one of the lemons about one-third of the way from one end. With the knife, carefully cut a 1-cm (0.40-in) slit into the lemon, about one-third of the way from the other end.
Caution: It might be better for an adult to handle the knife. In all cases, please work with the knife slowly and carefully.
3. Insert a copper coin into the slit so that about half of the coin is inside the lemon.
(Note: Make sure you use a shiny new coin for this. If it is old and dull, polish it with steel wool.)
Believe it or not, you can now get electricity from the lemon! It behaves like an electric cell, with the coin as the positive (+) terminal and the screw as the negative (-) terminal. Unfortunately, it is a very weak cell. But if you set up two more lemons in this manner, you can join them to make a lemon battery.
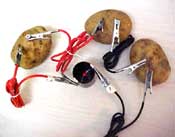
4. Add coins and screws to the other two lemons the same way you did with the first. Then join the three lemons using the wires and clips. The screw of the first lemon should be connected to the coin of the second lemon, and so on. Don't forget to add wires and clips to the first coin and the last screw.
5. Label the clip from the first coin with a "+" and the clip from the last screw with a "-". Like a real battery, your lemon battery has a positive (+) terminal and a negative (-) terminal.
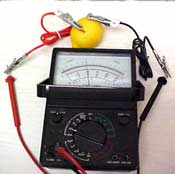
When connected like this—in what is called a series connection—the lemons work together to create about the same voltage, or electrical force, as two small flashlight batteries, somewhere between 2.5 and 3 volts. But this lemon battery does not create enough electrical current to light a flashlight bulb.
How can we tell if we really have created a battery? One way is to connect it to an electronic device that needs no more than about 2.5 to 3 volts but that does not require much electrical current. One such device is called a light-emitting diode, or LED for short. A low voltage and small current can cause an LED to light up.
The specifications on our LED package are: 5-mm LED, 1.8 volt (V), 20 milliamps (mA). This means the diameter of the LED is 5 mm, and that it requires 1.8 V and 20 mA of current to light up. Actually, the LED will light up dimly with less than 20 mA. Our lemon battery has enough volts but not nearly enough milliamps. So we will have to find a way to see its dim light. We tried enclosing it in a dark, opaque plastic container to shield it from outside light.
|
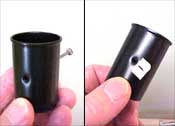
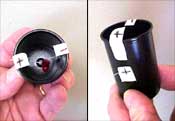
6. With the nail, carefully punch two holes in the sides of the plastic container, about halfway down. You might want to get an adult to do this for you. 7. Next, mark one hole with a "+" label and the other with a "-" label. |
|
|
|
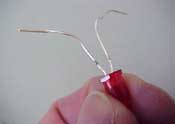
8. Bend the wires of the LED into smooth outward curves. Then observe the LED closely. It is mostly round; however, if you tilt it in a certain way, you will be able to see a flat surface near one of the wires. The wire nearest this flat surface is the negative terminal. In the photograph the wire on the left is the negative terminal of the LED. Can you see the small flat surface by the leftmost wire? |
|
|
|
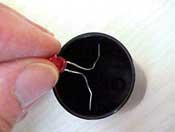
9. Line up the negative terminal wire of the LED with the "-" labeled hole in the container. Insert the LED into the container. Thread the negative terminal wire of the LED through the "-" labeled hole, and thread the other (positive terminal) wire through the "+" labeled hole. |
|
|
|
10. Pull the wires through the holes and secure them in place with the labels. Add labels to the top of the containter as well. Make sure that the LED is facing up. Let’s get everything prepared for the big moment. Line up the "+" side of the LED container with the "+" clip of your lemon battery. Bring the "-" clip of your lemon battery close to the "-" side of the container. |
|
|
|
The LED is very dim, owing to the small electrical current from your battery. The dark container helps you to see this dim light. The end of the LED acts like a magnifying glass. When you look directly into the end of the LED, you can see the light easily. This proves that you really have made a lemon battery that works! Congratulations! |
||
TroubleshootingIf you can’t see the LED light up try these fixes:
|
||
More Things to Try |
||
|
|
|
|
|
|
|
|
|
|
|
|
This content has been re-published with permission from SEED. Copyright © 2024 Schlumberger Excellence in Education Development (SEED), Inc.
Course:


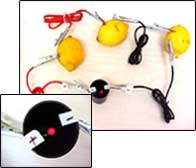 11. Now we are ready. Connect the positive terminal of the LED to the positive terminal of your lemon battery. Connect the negative terminal of the LED to the negative terminal of your battery. The LED lights up!